Wednesday, March 21, 2018

Energy and Roller Coasters


I was so excited when I saw Sarah blog in MathEqualsLove about Marble Roller Coasters in her Physical Science class. I knew when we got to potential and kinetic energy we had to do this. Just yesterday we did this in class. The exclamations of the students helped me to know that this lab was a big hit.


The class was split into groups of two and each group was given 2 insulation tubes that were cut in half, so they had a total of 7.2 meters of roller coaster track. Each group was also given 1 marble, a roll of masking tape, and three pieces of duct tape (to tape the ends of the track together).


Before the lab, I did some searching online for idea of parameters to give to the students and what to ask them to do in their notebooks. Here is one document I found, but most of my ideas came from this lab.


Most of the pairs worked on this for a solid 60 minutes and a few groups would have been happy to have a little more time.


Here is the direction sheet that I provided for each group. And this is the lab sheet that they were given to put into their notebooks.

Saturday, March 10, 2018

Essential Knowledge Student Reflections


Going with my theme this year of reflection and revision, I have had my students regularly reflect on the Essential Knowledge statements from the AP Biology framework. Last year, I organized the Essential Knowledge statements (along with the Enduring Understandings and Learning Objectives) by each unit and provided them to my students as study guides. I blogged about it last year here.

By the end of the year, I could tell that students weren't utilizing them as much as I had hoped. I want students to grapple with these statements, get familiar with the wording, and be able to connect what we are doing in class to these statements. First change: I made time in class for this reflecting to be done.


I also wanted students to have all of these reflections in one place to review them when they study for a test and to be able to look back as the year progresses to see their own growth from beginning to end. My goal was to automate as much of this process as possible. I already use a Google Form and Autocrat to grade labs and give students rich feedback in an easy-to-read document. I love the automation of this and blogged about it last school year here.

But the issue with reflections is that I want my students to have several reflections per unit. Each time they make a reflection with the Google Form, they create another row. So, I needed to be able to merge all of the separate rows of reflections from one student into one row. Enter an additional sheet Add-On called "Power Tools"! This add-on performs several functions, but the one I was interested in combines rows. I tell it what cell to look for identical entries (last name), and it merges all of the rows by one student into one row. This usually takes me two tries, because inevitably a couple of students will type an extra space after their names sometimes, but not all of the times. Power tools recognizes this space and doesn't consider the name identical.

I made a video of me making these documents for my students after they had done their reflections in Forms--just in case it makes more sense than the directions.


  • Create response spreadsheet from the Google Form.
  • In the newly formed spreadsheet, go to add-ons and get the add-on "Power Tools"
  • Once it's added, go to the add-on menu, Power Tools, and click start.


  • Select "Data" and then "Combine Rows."
  • I then let it auto-select the data (which is all of it).
  • Choose "last name" for the key column with duplicate records.
  • For choosing columns to merge, I choose all of the columns, the action is "merge values," and the delimiter is "comma."
  • Click "finish" and it merges the rows. 
  • Then sort the sheet alphabetically by last name, which makes it easier for me to figure out who added that extra space after their last name.
  • I remove the extra space and go through the combine rows process for a final time. (Which takes about 20 seconds.)
  • Close power tools and launch the add-on "AutoCrat" so I can make a document for each student of their responses. 
  • Give the job a name and click next.
  • Select a template (I make these ahead of time and will give links to them.) It'll show what rows will be merged into which part of the google doc. Since I've put these together I know that everything will match up the way it needs to. This did take some tweaking at first for me.
  • Chose how the documents will be named. I do <<First>> <<Last>> Unit # Reflections
  • It'll suggest a folder to put the merged documents into. You may select a different one if you'd like.
  • I skip the optional items and don't share the results by email, although if I had a lot of students I might.
  • Save and then when the Job pops up, hit the triangle play button.
  • Once all of the documents are merged, I go to the folder they were put in and print them out for my students to reference as they prepare for their upcoming unit test.


This sounds time consuming, and it did take me awhile to figure it all out. But now that I've done it several times, I can have it completed in about 10 minutes or less.

Here are the Google Forms and Templates for each unit.

Unit 1 Biochemistry                     Biochemistry Template
Unit 2 Cells                                  Cells Template
Unit 3 Cellular Energetics           Cellular Energetics Template
Unit 4 & 5 The Cell Cycle           The Cell Cycle Template
Unit 6 Molecular Genetics           Molecular Genetics Template
Unit 7 Evolution                           Evolution Template
Unit 8 Plants (this unit is so small, I skipped the reflections)
Unit 9 Ecology                              Ecology Template
Unit 10 Humans                            Human Form and Function Template

Saturday, February 24, 2018

Creative Series and Parallel Circuits


Last year, knowing that I would be teaching Physical Science this year, I started collecting ideas on Pinterest for labs. One of the pins was for making circuits with aluminum foil and Christmas lights from Nitty Gritty Science. I loved the idea and had a couple of strings of old lights that weren't working reliably. I actually started to cut the lights up at the end of last year to be prepared.


I made a basic model of a series and parallel circuit to show my students and then told them to be creative. The kids certainly didn't disappoint! Most loved the process and asked if they could bring the supplies to finish up at home. They worked in class for 80 minutes, and several students had only finished the series circuit, but were still in process for the parallel circuit by the time class was over.


We began by drawing a schematic of their design. Once the design was approved, they got their supplies of a manila folder, 2 brads, a sheet of foil, scissors, several Christmas lights, a 9 volt battery, and tape. They needed reminders that tape is an insulator and to make sure the foil is always touching foil for the entire circuit.


Several parents actually commented about the popularity of this lab to me when they saw me later.


I put together directions for each table of students and also a lab sheet for them to glue into their notebooks.

Thursday, February 15, 2018

Egg Drop Challenge


As we were wrapping up our unit on forces and interactions in Physical Science, I wanted the kids to have the opportunity to apply their knowledge and also have some practice with the engineering process. For our last class before the unit test, we had an egg drop challenge.

I did some research on line, but many of the challenges out there are for students to build an apparatus at home and bring it in for the competition. Since I only see my students for one 90 minute session a week, they are busy during the week with reading the chapter and doing other assignments. I wanted students to have the opportunity to test designs and make improvements as well as practice working as a team.  So, I pilfered ideas mainly from this document and put together what would be my student's in class building challenge.


Students had about 70 minutes to design and build their egg holder. Some were a little slow to start, but by the end they were all fully engaged. If I were to do this again, I'd try to figure out some way to limit the amount of glue from the glue gun used per team. I had about 7 sticks (for a full sized glue gun) and it was all used before some teams had a chance to use it even once. It was primarily one team that went hog wild with it.

In the end, of the seven teams, three of them successfully dropped their egg and had no damage to the egg. The other four were valiant attempts, all of which were exciting to watch.

Here are the directions that I gave students.  It also includes the list of materials that I provided each team. All of it fit in a gallon ziplock bag. Three of the teams asked if they could use the gallon bag, and I did allow them too--even though it wasn't on their list. For students' notebooks, I gave them this reflection sheet. I also made these score sheets. These scores did not effect their lab grade, but was used to decide some fun prizes. In the end, we did not measure the distance from the target since we had to drop them on the stairs and the egg holders were flying everywhere off the steps.


Saturday, February 3, 2018

Guided Reading Questions and Videos for AP Biology


I've been meaning to put this together all year, but life has just been too busy to get it all together. Even though it's my third year teaching the new AP Biology curriculum, I've come to realize that I will never finish tweaking this course, and so will never just breeze through a year of teaching it. On the bright side, I do feel like each year I teach it a little better! Here are my links to guided reading questions and corresponding videos to supplement the reading in AP Biology. All of these links are in old blog posts, but I thought I might be easier to have all of the links in one post. Here is a link to a document that has all of these units in table form, which I like better. It just doesn't copy and paste well into blogger.  Right now the chapter numbers correspond to the Campbell Biology 8th Ed., but next year we are switching to the 2nd Edition of Biology in Focus, so next year, I'll be changing the chapter numbers. I may change the questions some, but they should already match fairly well with Biology in Focus since I had chosen them based on what I saw in the Holtzclaw Test Prep review book for Campbell Biology and Biology in Focus. I love that Test Prep review book by the way!

Biochemistry: Unit 1


Chemical Context of Life

Chapter 2 Questions


Water

Chapter 3 Questions

Crash Course Water


Carbon and the Molecular Diversity of Life

Chapter 4 Questions

Crash Course Carbon


Macromolecules

Chapter 5 Questions

Crash Course Macromolecules


Enzymes

Chapter 8 Questions

Bozeman Biology Enzymes


Cells: Unit 2


A Tour of the Cell

Chapter 6 Questions

A Tour of the Cell (Bozeman)


Membrane Structure and Function

Chapter 7 Questions

In Da Club: Membranes and Transport (Crash Course)


Cell Communication

Chapter 11 Questions

Cell Communication (Bozeman)

Signal Transduction Pathways

Effects of Changes in Pathways


Metabolism: Unit 3


Introduction to Metabolism

Chapter 8 Questions

Gibbs Free Energy (Bozeman)


Cellular Respiration

Chapter 9 Questions

Cellular Respiration (Bozeman)


Photosynthesis

Chapter 10 Questions

Photosynthesis (Bozeman)


Cell Cycle and Mendelian Genetics: Unit 4 & 5


Cell Cycle

Chapter 12 Questions

Mitosis (Bozeman)


Meiosis and Sexual Life Cycles

Chapter 13 Questions

Meiosis (Bozeman)


Mendel and the Gene Idea

Chapter 14 Questions

Mendelian Genetics (Bozeman)

Heredity (Crash Course)


Chromosomal Basis of Inheritance

Chapter 15 Questions

Advanced Genetics (Bozeman)

Genetic Recombination and Gene Mapping (Bozeman)

Linked Genes (Bozeman)


Molecular Genetics: Unit 6


The Molecular Basis of Inheritance

Chapter 16 Questions

DNA Replication (Bozeman)


Gene Expression

Chapter 17 Questions

Transcription and Translation (Bozeman)


Regulation of Gene Expression

Chapter 18 Questions

Gene Regulation (Bozeman)


Viruses

Chapter 19 Questions

Viruses (Bozeman)


DNA Tools and Biotechnology

Chapter 20 Questions

Molecular Biology (Bozeman)


Genomes and their Evolution

Chapter 21 Questions

Evolutionary Development (Crash Course)


Evolution: Unit 7


Descent with Modification

Chapter 22 Questions 

Natural Selection (Crash Course)


The Evolution of Populations

Chapter 23 Questions

Population Genetics: When Darwin Met Mendel (Crash Course)


The Origin of Species

Chapter 24 Questions

Speciation: Of Ligers and Men (Crash Course)


The History of Life on Earth

Chapter 25 Questions

Evolution: It's a Thing (Crash Course)


Phylogeny and the Tree of Life

Chapter 26 Questions

Taxonomy: Life's Filing System (Crash Course)


Bacteria and Archaea

Chapter 27 Questions

Old and Odd: Archaea, Bacteria, & Protists (Crash Course)


Unit 8: Plants

Plant Form and Function


Unit 9: Ecology

Animal Behavior


Ecology and the Biosphere


Population Ecology


Community Ecology


Ecosystems and Energy


Conservation Ecology and Global Change


Friday, January 19, 2018

Our Best Bacterial Transformation Lab Yet


Last year when we did our bacterial transformation lab, the results were lackluster at best. We had two transformed colonies on one of the LB/amp plates and one on a LB/amp/IPTG plate. We don’t have a digital water bath, and last year I struggled to keep the 42 degree water bath at 42 degrees on the hot plate. This is a heavy preparation lab to have poor results.


Since joining the National AP Biology Teachers group on Facebook, I had seen post after post of teachers raving about the transformation rates from the lab kit from Bio-Rad. So, when it was time to put in orders for this school year, we ordered the Bio-Rad Transformation kit through Wards.


The kit came in to school over the summer. I stopped by occasionally to check what orders were in. Then two weeks went by without me stopping in. When I finally came by to check, the kit was already sitting in the un-air conditioned storage room including the bag of bacteria, plasmids, ampicillin, and arabinose that says to refrigerate immediately. I took these materials out and got them into a refrigerator and started to worry that the kit was ruined even before we started. I hopped onto the Facebook group to see what people said about the kit and not refrigerating the items immediately.  I was surprised at how many teachers this happened to and was relieved to see that most of them had no adverse effects.


I had also shared with a colleague about how much I would like to have a digital water bath for this lab, but felt the cost was prohibitive. She suggested we try sous vide. I did some research and found an Anova Sous Vide Immersion Circulator for $109 on Amazon with good ratings and put it on our supply order. I brought in an old pot and put the circulator in. Within 10-15 minutes I had a water bath at exactly 42 degrees Celsius that remained at 42 degrees for as long as I wanted it there.


I did make a couple of other mistakes as I prepped for the lab. I started heating the LB agar in an (Ehrlemyer) flask on a hot plate. I stepped away to rehydrate the ampicillin and arabinose and heard a sizzling noise. I looked over to the hot plate to see agar erupting out of the flask. Fortunately the hot plate wasn’t plugged in behind the plate, but to the side of it, so I quickly unplugged it (and was glad I was wearing goggles, a lab apron, and closed toe shoes). Then I was panicked that I had lost too much agar to be able to pour all of the plates. I decided to scrape as much of the agar on the counter back into the flask and simmer it for 10 minutes to make sure it was sterilized. This time I stayed with it the whole time and there were no more volcanos.


My other mistake was that I rehydrated the ampicillin and arabinose with Luria broth instead of the transformation solution (calcium chloride). It wasn’t bad for these powders, but it meant I didn’t have enough broth left for my students to use in the lab. I doled it out carefully, but for the last group, I used left-over broth from the year before. (And I'm relieved to say they still had a successful transformation.)


I am happy to report that this year, we had some of our best transformation rates. I did have two groups with no transformation, but the other four had success. We certainly can’t blame the water bath!


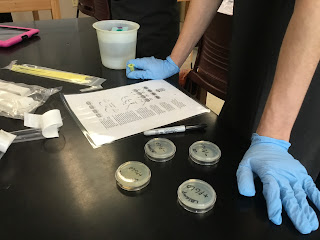
Fortunately, I had enough agar to pour an extra LB/amp/ara plate for each lab group. We took the non-glowing transformed colonies from the LB/amp plates and swabbed them onto the spare plates. Students were able to see how the presence of arabinose really does switch on the jellyfish green protein gene when we looked at the plates the next day. This was one of our best years for this lab!


Wednesday, January 17, 2018

Tweaking Lorenzo’s Oil


This year, AP Bio class time at my school was increased to four 80 minute blocks a week. This is up 40 minutes from last year. One of the benefits is that near Christmas we were at a good place in our curriculum and I was able to do the whole Lorenzo’s Oil movie unit in the three day week we had before Christmas break instead of splitting it before and after Break. (I blogged about this last year here.) This extra time allowed me to change things up a little. The first day, we just watched the movie. I do stop it on occasion to clarify and check for understanding. On the second day, we started with the demyelination activity. We used to do this before the very beginning of the movie, but after they’ve watched Lorenzo’s decline, the activity is more meaningful. We discussed the questions as a class and then went back to watching the movie. I was a little nervous because we only had about 30 minutes left of the movie for day 3, but we also had the competitive inhibition activity to do. I revised how we did it and loved it.


I wanted students to see how keeping the enzyme busy making unsaturated fatty acids increases the time the enzyme takes to build the C24 saturated fatty acids that were eating Lorenzo’s myelin. (Thus resulting in lower amounts of the bad saturated fatty acids in his blood.) This time, students started with a paper bag of jumbo silver paper clips (about 20 paper clips each representing 2 carbons), and a C14 fatty acid chain made of 7 joined jumbo paper clips. Each lab group timed two trials to see how long it took to build their saturated fatty acid into a C24 saturated fatty acid that was eating away at Lorenzo's myelin.


Then I gave them the original 7 paper clip chain and a 7 paper clip chain of neon paper clips to represent an unsaturated fatty acid and added about 10 neon (unsaturated) paper clips to the bag. Students timed two more trials, but this time, if they pulled a neon clip they added it to the neon chain. For the last trial, they were still timing how long it took to build a saturated C24 (silver jumbo clips), but we added another 15 neon clips to the bag. They averaged their times to build C24 for each scenario and then we looked at the class results. Maybe we'll eventually graph the means of each trial and add some errors bars.

Here are the numbers from the board.

Making Bad (C24)

all bad (in seconds)
some good (in seconds)
more good (in seconds)
Group 1
27.2
78
78.7
Group 2
29
38
47
Group 3
34.4
87.5
63.2
Group 4
37
76
108
Averages (n=8)
31.9
69.9
74.2