Thursday, November 17, 2016

Membrane Models


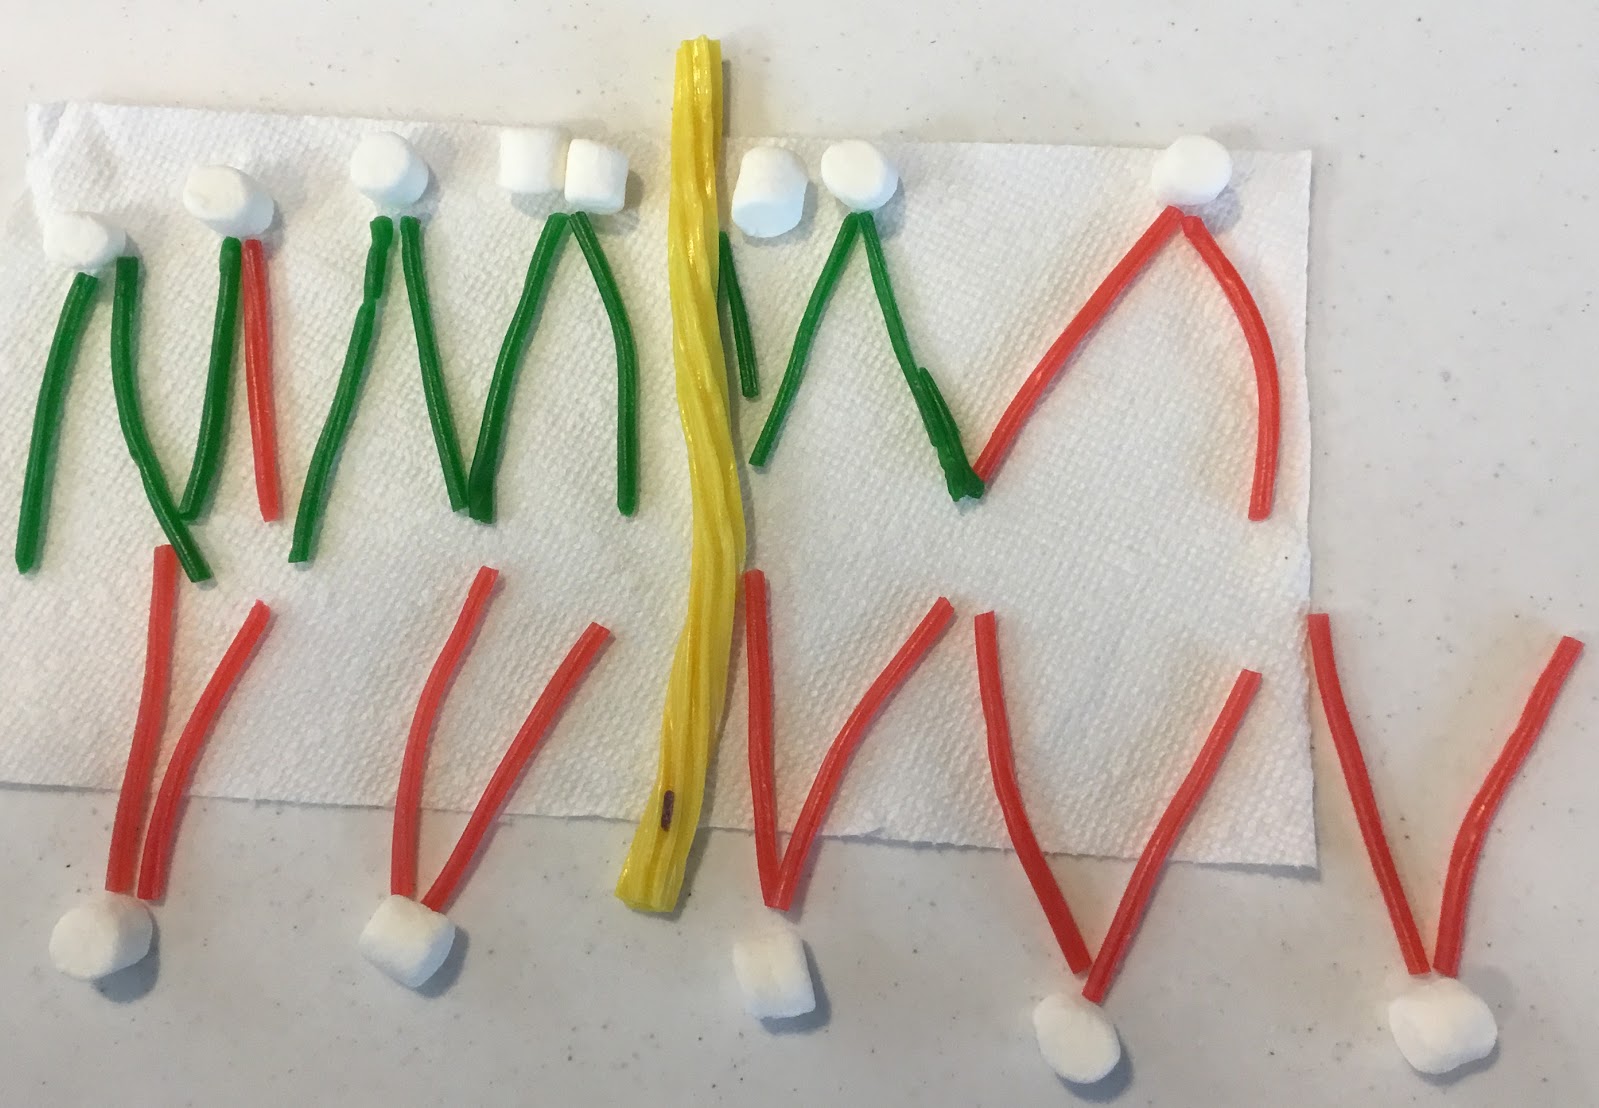
Today in my Living Environment class, we started talking about cell membranes and the idea of them being selectively permeable.  Since we can't actually see the structure of the lipid bilayer, we built it.  We talked about the hydrophilic heads and the two hydrophobic tails of each phospholipid. We also talked about the proteins embedded in the bilayer that allow molecules through that couldn't otherwise pass through the bilayer.


Each student had a slightly different vision of their membrane. We had some very spread out phospholipids and some very tightly packed ones. Some were more fluid than others. The idea came from a pin on Pinterest.  It was just a pin of a picture, so I'm not sure who to attribute it to.  I typed up a version of the activity for my students based on the picture.  I just made it on a half page, so it would fit easily in their notebooks.  

This bilayer got squeezed into one layer. Oops!

We capped the class off with our diffusion and osmosis lab, so they could see the actual movement of molecules across a membrane. 


Friday, November 11, 2016

Unit 5 Reading Guides--Mendelian Genetics


The Mitosis and Meiosis unit will actually get us to Christmas break. I've made some revisions to the guided reading questions for this two-chapter unit. Here are the Holzclaw guided reading questions pared down to fit within the new AP Biology framework.

Chapter 14 Mendel and the Gene Idea

Chapter 15 The Chromosomal Basis of Inheritance

Wednesday, November 9, 2016

Introducing the Cell Cycle


Last year I found a lab that worked perfectly for introducing the cell cycle unit.  It was on Darci Harland's blog STEM Mom, titled Engineering Cell Division-a NGSS Lesson. I didn't even reformat it--just printed it as is.


I laid out a box of random supplies such as yarn, string, beads, pipe cleaners, play dough, modeling clay, and gummy worms.  The gummy worms just add an element of fun.  I think they look like chromosomes, but my students usually use them for something else in the cell. They happily eat the worms when they finish the project.


We do this before they even start taking notes on the mitosis and meiosis chapters.  As they work through the design and questions, we can talk about what they are realizing has to happen in a cell before it can divide.  It's so much more than just making a copy of the DNA.  This activity also gives me something concrete to refer back to as we delve into the details of the cell cycle.


Wednesday, November 2, 2016

Modifying the AP Biology Respiration Lab


Last year when it came time for the respiration lab, we dutifully put together the microrespirometers to complete the lab.  It was fairly labor-intensive, with gluing in the capillary tubes, and gluing on nuts and bolts to make sure the respirometer would sink in the water bath. We had a few leaks, and not all of the respirometers gave us reliable data.

At some point, I read the tips on the College Board website for this lab.  One teacher mentioned that her class made respirometers with test tubes, one-hole stoppers, and a 2 mL pipet.  I spoke with another teacher at an AP Biology workshop I attended last year, and she did the respiration lab with crickets. I decided to give both ideas a try this year.


Before the lab, I made a trip to Lowe's to figure out how to keep the respirometers from floating. Steel pipe couplers provided the solution, The test tubes slid right into them. I also did some searching to find a respiration lab that used crickets.  I found one I liked on Mr. Yeung's website. Here's the link to the lab. The key change we made was using germinating peas instead of meal worms to go along with the crickets. Fortunately I found these white plant trays in the science closet at school, which worked great for the water baths. We also took readings every 2 minutes for 20 minutes.


What a difference a few changes make!  The test tube respirometers worked fabulously.  We had no leaks, and had good readings for most of the respirometers.  A storm was moving through the day we did the lab, and we saw some movement of water into and out of our control respirometers with the plastic beads. We were able to use those readings to make some corrections to the corresponding respirometers. Our biggest challenge was getting the crickets into the test tubes! I am happy to report that all of the crickets survived the experiment.


Next year, I'd like to try KOH pellets or soda lime pellets instead of the liquid KOH we use.  I've seen several teachers mention they like using the pellets better.

Monday, October 31, 2016

Unit 4 Reading Guides-Mitosis and Meiosis


We're getting ready to start our Mitosis and Meiosis unit, so I've made some revisions to the guided reading questions for this two-chapter unit. Here are the Holzclaw guided reading questions pared down to fit within the new AP Biology framework.

Chapter 12: The Cell Cycle

Chapter 13: Meiosis and the Sexual Life Cycles 

Independent and Dependent Variables: Pumpkins in the Patch


I felt like my Living Environment students needed some more practice determining what the independent and dependent variables are in an experiment.  I also wanted to emphasize that when we graph the results of our experiments, the independent variable values go on the x-axis and the depended variable values go on the y-axis.


We were just going to work with a practice set we used earlier in the year, but would place the independent variable horizontally (x-axis) and the dependent variable vertically (y-axis).  I found this set of variables in the blog post on in stillness the dancing titled Functions from the Start.


The envelopes of the variables were in my binder ready to go.  Then I read Sarah Carter's latest blog post on Math = Love, and knew I needed to change what we were doing.  I shamelessly copied her activity, making a few modifications.   She called this activity "Ghosts in the Graveyard." I decided to call it Pumpkins in the Patch so I could use it any time in the fall.


After downloading her PDF files, I converted them into Google docs,  This allowed me to change the font and title. Otherwise the challenges are word for word.  We'll use pumpkins instead of ghosts, of course.  My other change was the answer sheet that the students fill out as they go.   Instead of just a table to fill out, I put some of what I learned in the teacher workshop I went to last Friday on using Google apps in the classroom to work.  To emphasize dependent on the y-axis and independent on the x-axis, the answer sheet is full of vertical and horizontal arrows that I put together in google drawings.


The left-over Halloween candy will come in handy for prizes when we do this in class later in the week. Each time a team of students finishes one challenge, they put a pumpkin with their name on it in one of the patches (big circles drawn on the white board).  Each pumpkin patch will have a different point value that all of the pumpkins in it will receive. At the end of the game, the point value for each patch will be revealed.  The team with the most points will get a few fun sized candy bars.

Here's the challenge document with the pumpkins.  Here's the answer sheet.

Tuesday, October 25, 2016

A Big Picture of Photosynthesis


After giving my students a big picture of cellular respiration, I wanted them to also have a big picture for photosynthesis.  I found this blog post  on the Science Tutor.  There was a graphic organizer for the Calvin cycle and a story board for the light reactions. I used them last year, but I wanted my students to actually see the process of the light reactions. This year I spent some time with shapes in MS Word to put together a picture of both the light reactions and the Calvin cycle.

During class I give my students a set of instructions to work through to help them understand what is going on in the diagrams and in the process of photosynthesis itself. Here is the document they work through. The document also includes links to two different videos on photosynthesis to help students understand what's going on in their diagram.